Look how far we have come… We started this series by looking at what CoreML is and made sure that our environment was suitable. We decided to use linear regression as our model, and chose to use the Boston Price dataset in our exploration for this implementation. We built our model using Python and created our .mlmodel object and had a quick exploration of the model’s properties. We then started to build our app using Xcode (see Part 1, Part 2 and Part 3). In this final part we are going to take the .mlmodel and include it in out Xcode project, we will then use the inputs selected from out picker and calculate a prediction (based on our model) to be displayed to the user. Are you ready? Nu kör vi!
 Let us start by adding the
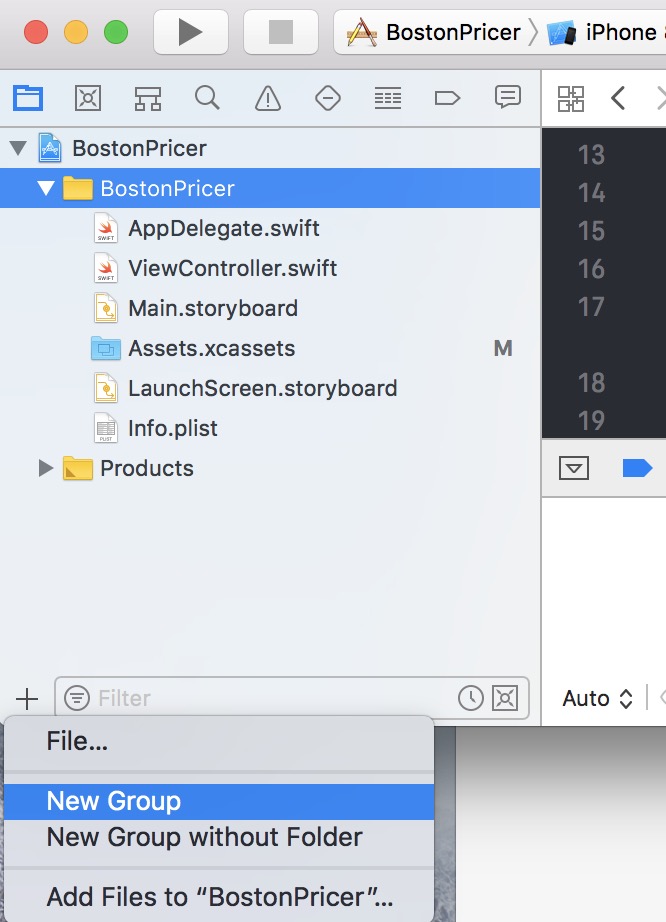
 .mlmodel we created earlier on so that it is an available resource in our project. Open your Xcode project and locate your PriceBoston.mlmodel file. From the menu on the left-hand side select the “BostonPricer” folder. At the bottom of the window you will see a + sign, click on it and select “New Groups”. This will create a sub-folder within “BostonPricer”. Select the new folder and hit the return key, this will let you rename the folder to something more useful. In this case I am going to call this folder “Resources”.
Open Finder and navigate to the location of your BostonPricer.mlmodel. Click and drag the file inside the “Resources” folder we just created. This will open a dialogue box asking for some options for adding this file to your project. I selected the “Create Folder References” and left the rest as it was shown by default. After hitting “Finish” you will see your model now being part of your project. Let’s now go the code in ViewController and make some needed changes. The first one is to tell our project that we are going to need the powers of the CoreML framework. At the top of the file, locate a line of code that imports UIKit, right below it type the following:
import CoreML
Inside the definition of the ViewController class, let us define a constant to reference the model. Look for the definitions of the crimeData and roomData constants and nearby them type the following:
let model = PriceBoston()
You will see that when you start typing the name of the model, Xcode will suggest the right name as it knows about the existence of the model as part of its resources, neat!
We need to make some changes to the getPrediction()function we created in the last post. Go to the function and look for place where we pick the values of crime and rooms and right after that write the following:
guard let priceBostonOutput = try? model.prediction(
            crime:crime,
            rooms: Double(rooms)
            ) else {
                fatalError("Unexpected runtime error.")
        }
You may get a warning telling you that the constant priceBostonOutput was defined but not used. Don’t worry, we will indeed use it in a little while. Just a couple of words about this piece of code, you will see that we are using the prediction method defined in the model and that we are passing the two input parameters that the model expects, namely crime and rooms. We are wrapping this call to the prediction method around a try statement so that we can catch any exceptions. This is where we are implementing our CoreML mode!!! Isn’t that cool‽
We are not done yet though; remember that we have that warning from Xcode about using the model. Looking at the properties of the model, we can see that we also have an output attribute called price. This is the prediction we are looking for and the one we would like to display. Out of the box it may have a lot of decimal figures, and it is never a good practice to display those to the user (although they are important in precision terms…). Also, with Swift’s strong typing we would have to typecast the double returned by the model into a string that can be printed. So, let us prepare some code to format the predicted price. At the top of the ViewController class, find the place where we defined the constants crimeData and roomData. Below them type the following code:
let priceFormat: NumberFormatter = {
        let formatting = NumberFormatter()
        formatting.numberStyle = .currency
        formatting.maximumFractionDigits = 2
        formatting.locale = Locale(identifier: "en_US")
        return formatting
    }()
We are defining a format that will show a number as currency in US dollars with two decimal figures. We can now pass our predicted price to this formatter and assign it to a new constant for future reference. Below the code where the getPrediction function was defined, write the following:
let priceText = priceFormat.string(from: NSNumber(value:
            priceBostonOutput.price))
Now we have a nicely formatted string that can be used in the display. Let us change the message that we are asking our app to show when pressing the button:
let message = "The predicted price (in $1,000s) is " + priceText!
We are done! Launch your app simulator, select a couple of values from the picker and hit the “Calculate Prediction” button… Et voilà, we have completed our first implementation of a CoreML model in a working app.

There are many more things that we can do to improve the app. For instance, we can impose some constraints on the position of the different elements shown in the screen so that we can deploy the application in the various screen sizes offered by Apple devices. Improve the design and usability of the app and designing appropriate icons for the app (in various sizes). For the time being, I will leave some of those tasks for later. In the meantime you can take a look at the final code in my github site here.
Enjoy and do keep in touch, I would love to hear if you have found this series useful.